Showing posts with label Christmas. Show all posts

Wednesday, December 23, 2009

DIY: Christmas Ornaments


I decided to make Christmas ornaments for a few good friends. I used a different family's photo for each ornament, a simple wood circle (a pack of 4 was around $2 at Michaels), an adhesive roller, a few jingle bells and red ribbon. Flannel Man drilled a small hole at the top of each of the wood discs. I cut the photos to the size I wanted and then cut a circle out of card stock to layer beneath the photo.

I used a rolling adhesive and centered the card stock circles on the wooden circles. Then I used the adhesive to glue the photo on top of the card stock. I covered the entire front of the ornament with a thin layer of Modge Podge. After letting that dry (it took about an hour) I threaded the ribbon through the bells and then threaded it through the hole in the wood. A few quick knots and they were done!

On the back of each I wrote "The Smith Family 2009" (using their names). I tied the ornaments to the outside of each family's wrapped Christmas presents with ribbon.

They were easy to make and the wood and modge podge make a sturdy combination, so they should last a long time.

Photos by moi.

Tuesday, December 22, 2009

Frosty, the Cheese Ball?


Wonder no more what you will take to the next family gathering! This is a cheese ball made from this recipe. So, with a few carefully placed raisins, pretzels, and a carrot nose you will have the perfect winter appetizer!

Monday, December 21, 2009

DIY: Doily Luminaries


I originally got the idea to make these Doily Luminary bags from Martha Stewart. My best friend and I made them for my wedding, but it ended up being too light outside to see them well. So I saved them and now, a few months later, they were perfect for lining the path to our house for a holiday house warming party.


We started with simple white luminary bags and paper doilies. You can get those at any craft store. Then we tried to use a hot glue gun, but that wasn't working so well, so we ended up using double-sided tape.


By the time we had made about 10 bags we were getting a little creative. We cut the doilies in half or fourths and used just the edges to line the bags. We also tried cutting patterns and initials into the doilies before taping them in.


When finished the bags create a lacy effect that looks great. You can use regular tea lights or the flameless kind, though the real ones have a better glow.


Fill the bottom of the bags with about 2 cups of sand or kitty litter. I used kitty litter so when I was done with it I could pour it into two containers which Flannel Man and I can put in our trunks. Kitty litter is perfect for emergency car kits because it can be used to create traction if you are stuck in an icy rut.


Photos by moi.

Friday, December 18, 2009

The gift (bags) that keeps on giving


Christmas is only a week away, which is crazy. Am I the only one who thinks this year has just flown by? Flannel Man and I have put up our tree and the floor beneath it is covered with presents for our family and friends.


The name tags on the gifts were created from left over pieces of scrapbook paper and Christmas cards we've received. The gift bags, tissue paper, ribbon and bows are all reused from gifts we've received.


Our tree is covered with the ornaments we grew up with, ones we've bought on various vacations, etc. It was so much fun to put up our first "married" tree and to combine our eclectic decorations.


My niece and nephew are getting some of my old toys, from when I was a tot, as gifts this year. Their mom, my sister, suggested it and I think it's a great idea. The toys are still in great shape and now a new generation will get a chance to enjoy them.


Photos by moi.

Wednesday, December 16, 2009

DIY: Cork Tags


I hosted my very first Christmas party last weekend. For the appetizers we were serving I made little tags to explain what each one was.

I used wine corks and pennies to create them. I cut half way down the cork (lengthwise) and then hot glued the cork to a penny.

Then I made tags using old Christmas gift tags and pieces of scrapbook paper. It was cheap (I didn’t have to buy anything) and easy.

Photos by moi.

Tuesday, December 15, 2009

Gifts for Christmas and Beyond!


I LOVE giving gifts. I LOVE giving frugal, practical, and creative gifts! So, here are some ideas for others for the upcoming Christmas season.....

1.) Passions.


Cleaning? (Yes, for some cleaning is a passion! ) A recipe for a homemade cleaning solution. Cost: Bottle and Ribbon @ Target $1.oo bins.

2.) Recent Developments surrounding that persons life.
Did they recently lose a job? Gift cards might be a fun splurge on things that they can no longer afford. Gain a job? A new eco-friendly lunchbox and water bottle might be useful.


(A Starbucks gift card sits in a smaller sized version of Martha's Tissue Paper Decorations to look like flowers. The stems are made out of green pipe cleaners. The butterfly is holding on with a white pipe cleaner taped to the body. I made this for a birthday. Could easily be adapted to Christmas! Cost: $2.00 for tissue paper and then card amount)

3.) Every Thingamagig.
Go the sentimental route.


(This was made from the site Wordle. Just put in all your adjectives describing a person, print, and frame. If giving one to your husband....First, you need to google "How to spell Nurture" and then if you accidentally spell it wrong on your gift, google "How to lie to your husband and tell him that the word nuture is French for "looks good naked". Cost: $4.00 for frame or spray paint old one)

4.) Elderly.
Mini teapots? Nah. Socks? Nah. Personalized car mats? Maybe. But a more practical gift would be a basket of snacks.


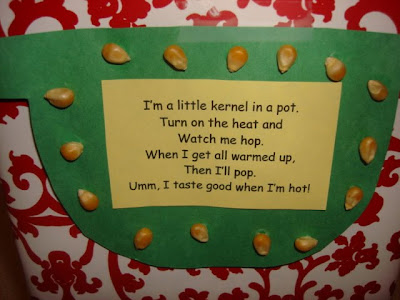
(Popcorn never tasted so good with a toddlers poem on the front of a wrapped popcorn box! Cost: $2.00 for popcorn)

5.) Children.
This is the easiest of them all! You just need to step out of the box, or maybe just back in it. Because boy are boxes cool! Seriously, kids don't need much, just a little creativity from adults.


(Brooms got at a local store with additions of stickers and their names written with puffy paint! "Helping" never looked so fun! Cost: Brooms $4.00)

(This is a gift that children of all ages can enjoy. Ask for or take a picture of all of your friends/family members. So, that they can become "dolls" on your fridge! I did it at a recent party taking pictures of grandparents and friends alike. This picture must be full length, head to toes. They will say you are weird. You will say what's weird about sticking you on the fridge for my children to play with? They will be confused by this, and you must hurry and take the picture at this moment. )


-cut out the person from your photo.
-go to have it laminated or do it yourself.
-take a strip of magnet paper (I got from Michael's) and stick on the little photo person
-snip around them. Tadaaa!

-stick them on your fridge and behold the adventures they will have!
Cost: $6.00 with coupon for magnets, laminate $3.00 @ Teacher store, photos printed Free with new membership to online photo website- makes multiple gifts!)


**What is your most creative, fun, weird, wacky gift to give?**